派大星的博客

很多事情不是会了才能做,而是做了才能学会


  • 首页

  • 标签

  • 分类

  • 关于

  • 搜索

SpringBoot整合Druid和MyBatis

发表于 2019-06-22 | 分类于 springboot,mybatis

1. 加入依赖

1
2
3
4
5
6
7
8
9
10
11
12
13
14
15
16
17
18
19
20
21
22
23
24
25
26
27
28
29
30
31
32
33
34
35
<!-- druid -->
<dependency>
<groupId>com.alibaba</groupId>
<artifactId>druid</artifactId>
<version>1.1.16</version>
</dependency>
<!-- mybatis -->
<dependency>
<groupId>org.mybatis</groupId>
<artifactId>mybatis</artifactId>
<version>3.5.1</version>
</dependency>
<!-- mybatis对接Spring -->
<dependency>
<groupId>org.mybatis</groupId>
<artifactId>mybatis-spring</artifactId>
<version>2.0.1</version>
</dependency>
<!-- mysql链接驱动 -->
<dependency>
<groupId>mysql</groupId>
<artifactId>mysql-connector-java</artifactId>
<version>8.0.15</version>
</dependency>
<!-- jdbc -->
<dependency>
<groupId>org.springframework.boot</groupId>
<artifactId>spring-boot-starter-jdbc</artifactId>
</dependency>
<!-- log4j -->
<dependency>
<groupId>log4j</groupId>
<artifactId>log4j</artifactId>
<version>1.2.17</version>
</dependency>

2. application.yml中添加配置

1
2
3
4
5
6
7
8
9
10
11
12
13
14
15
16
17
18
19
20
21
22
23
24
25
26
27
28
spring:
druid:
datasource:
type: com.alibaba.druid.pool.DruidDataSource
driver-class-name: com.mysql.cj.jdbc.Driver
initialSize: 5
minIdle: 5
maxActive: 20
maxWait: 60000
timeBetweenEvictionRunsMillis: 60000
minEvictableIdleTimeMillis: 300000
validationQuery: SELECT 1 FROM DUAL
testWhileIdle: true
testOnBorrow: true
testOnReturn: true
poolPreparedStatements: true
maxPoolPreparedStatementPerConnectionSize: 20
filters: stat,wall,log4j
connectionProperties: druid.stat.mergeSql=true;druid.stat.slowSqlMillis=5000
useGlobalDataSourceStat: true
loginUsername: pibigstar
loginPassword: pibigstar
#数据库连接地址
url: jdbc:mysql://127.0.0.1:3306/test?useUnicode=true&allowMultiQueries=true&characterEncoding=utf-8&serverTimezone=Asia/Shanghai&useSSL=false
#用户名
username: root
#密码
password: 123456

3. 配置映射类

1
2
3
4
5
6
7
8
9
10
11
12
13
14
15
16
17
18
19
20
21
22
23
24
25
26
27
28
@Configuration
@ConfigurationProperties(prefix = "spring.druid.datasource")
public class DruidProperties {
private String type;
private String driverClassName;
private String url;
private String username;
private String password;

private Integer initialSize;
private Integer minIdle;
private Integer maxActive;
private Long maxWait;
private Long timeBetweenEvictionRunsMillis;
private Long minEvictableIdleTimeMillis;
private String validationQuery;
private boolean testWhileIdle;
private boolean testOnBorrow;
private boolean testOnReturn;
private boolean poolPreparedStatements;
private Integer maxPoolPreparedStatementPerConnectionSize;
private String filters;
private String connectionProperties;
private boolean useGlobalDataSourceStat;
private String loginUsername;
private String loginPassword;
//setter,getter方法
}

4. 初始化Druid

1
2
3
4
5
6
7
8
9
10
11
12
13
14
15
16
17
18
19
20
21
22
23
24
25
26
27
28
29
30
31
32
33
34
35
36
37
38
39
40
41
42
43
44
45
46
47
48
49
50
51
52
53
54
55
56
57
58
59
60
61
62
63
64
65
66
67
68
69
70
71
72
73
74
75
76
77
78
79
80
81
82
83
84
85
86
87
88
89
90
91
@Configuration
public class DruidAutoConfiguration {

@Autowired
private DruidProperties properties;

@Bean
@Primary
public DruidDataSource dataSource() throws Exception {
DruidDataSource dataSource = new DruidDataSource();
dataSource.setDriverClassName(properties.getDriverClassName());
dataSource.setUrl(properties.getUrl());
dataSource.setUsername(properties.getUsername());
dataSource.setPassword(properties.getPassword());
dataSource.setInitialSize(properties.getInitialSize());
dataSource.setMinIdle(properties.getMinIdle());
dataSource.setMaxActive(properties.getMaxActive());
dataSource.setMaxWait(properties.getMaxWait());
dataSource.setTimeBetweenEvictionRunsMillis(properties.getTimeBetweenEvictionRunsMillis());
dataSource.setMinEvictableIdleTimeMillis(properties.getMinEvictableIdleTimeMillis());
String validationQuery = properties.getValidationQuery();
if (validationQuery != null && !"".equals(validationQuery)) {
dataSource.setValidationQuery(validationQuery);
}
dataSource.setTestWhileIdle(properties.isTestWhileIdle());
dataSource.setTestOnBorrow(properties.isTestOnBorrow());
dataSource.setTestOnReturn(properties.isTestOnReturn());
if (properties.isPoolPreparedStatements()) {
dataSource.setMaxPoolPreparedStatementPerConnectionSize(properties.getMaxPoolPreparedStatementPerConnectionSize());
}
String connectionPropertiesStr = properties.getConnectionProperties();
if (connectionPropertiesStr != null && !"".equals(connectionPropertiesStr)) {
Properties connectProperties = new Properties();
String[] propertiesList = connectionPropertiesStr.split(";");
for (String propertiesTmp : propertiesList) {
String[] obj = propertiesTmp.split("=");
String key = obj[0];
String value = obj[1];
connectProperties.put(key, value);
}
dataSource.setConnectProperties(connectProperties);
}
dataSource.setUseGlobalDataSourceStat(properties.isUseGlobalDataSourceStat());
WallConfig wallConfig = new WallConfig();
wallConfig.setMultiStatementAllow(true);
WallFilter wallFilter = new WallFilter();
wallFilter.setConfig(wallConfig);
List<Filter> filters = new ArrayList<>();
filters.add(wallFilter);
filters.add(new StatFilter());
filters.add(new Log4jFilter());
dataSource.setProxyFilters(filters);
return dataSource;
}

/**
* Druid的Servlet
* @return
*/
@Bean
public ServletRegistrationBean druidStatViewServlet() {
ServletRegistrationBean servletRegistrationBean = new ServletRegistrationBean(new StatViewServlet(), "/druid/*");

/** 添加初始化参数:initParams */
/** 白名单,如果不配置或value为空,则允许所有 */
servletRegistrationBean.addInitParameter("allow", "127.0.0.1,192.0.0.1");
/** 黑名单,与白名单存在相同IP时,优先于白名单 */
servletRegistrationBean.addInitParameter("deny", "192.0.0.1");
/** 用户名 */
servletRegistrationBean.addInitParameter("loginUsername", properties.getLoginUsername());
/** 密码 */
servletRegistrationBean.addInitParameter("loginPassword", properties.getLoginPassword());
/** 禁用页面上的“Reset All”功能 */
servletRegistrationBean.addInitParameter("resetEnable", "false");
return servletRegistrationBean;
}

/**
* Druid拦截器,用于查看Druid监控
* @return
*/
@Bean
public FilterRegistrationBean druidStatFilter() {
FilterRegistrationBean filterRegistrationBean = new FilterRegistrationBean(new WebStatFilter());
/** 过滤规则 */
filterRegistrationBean.addUrlPatterns("/*");
/** 忽略资源 */
filterRegistrationBean.addInitParameter("exclusions", "*.js,*.gif,*.jpg,*.png,*.css,*.ico,/druid/*");
return filterRegistrationBean;
}
}

5. Druid与Mybatis对接

1
2
3
4
5
6
7
8
9
10
11
12
13
14
15
16
17
18
19
20
21
22
23
24
25
26
27
28
29
30
31
32
33
34
35
36
37
38
39
40
41
42
43
44
45
46
47
48
49
50
51
52
53
54
55
56
57
58
59
60
61
62
63
64
@Configuration
@EnableTransactionManagement
@AutoConfigureAfter(DruidAutoConfiguration.class)
@MapperScan(value = {"com.pibigstar.**.mapper.**"})
public class MybatisAutoConfiguration{

/**
* mybatis 配置路径
*/
private static String MYBATIS_CONFIG = "classpath:mybatis/mybatis-config.xml";

/**
* mybatis mapper xml
*/
private static String[] MAPPER_LOCATIONS_CONFIG = new String[]{
"classpath*:com/pibigstar/**/mapper/mysql/*.xml",
"classpath*:com/pibigstar/**/mapper/mysql/*/*.xml",
};

@Autowired
private DruidDataSource dataSource;

/**
* 创建sqlSession
* @return
* @throws Exception
*/
@Bean(name = "sqlSessionFactory")
public SqlSessionFactoryBean createSqlSessionFactoryBean() throws Exception {

PathMatchingResourcePatternResolver resolver = new PathMatchingResourcePatternResolver();
Resource resource = resolver.getResource(MYBATIS_CONFIG);

SqlSessionFactoryBean sqlSessionFactoryBean = new SqlSessionFactoryBean();

/** 设置mybatis configuration 扫描路径 */
sqlSessionFactoryBean.setConfigLocation(resource);

/** 设置datasource */
sqlSessionFactoryBean.setDataSource(dataSource);

/** 设置mapperLocations */
List<Resource> all = new ArrayList<>();
for (String mapperLocation : MAPPER_LOCATIONS_CONFIG) {
all.addAll(Arrays.asList(resolver.getResources(mapperLocation)));
}
sqlSessionFactoryBean.setMapperLocations(all.toArray(new Resource[all.size()]));
return sqlSessionFactoryBean;
}

@Bean
public SqlSessionTemplate sqlSessionTemplate(SqlSessionFactory sqlSessionFactory) {
return new SqlSessionTemplate(sqlSessionFactory);
}

/**
* 配置事务管理器
*/
@Bean(name = "transactionManager")
@Primary
public DataSourceTransactionManager transactionManager(@Qualifier("dataSource") DataSource dataSource) throws Exception {
return new DataSourceTransactionManager(dataSource);
}
}

6. 新建mybatis-config.xml文件

在resources下新建mybatis文件夹,在此文件夹下新建mybatis-config.xml文件
可以在此文件中新增mysql插件之类的。

1
2
3
4
5
6
7
8
9
10
<?xml version="1.0" encoding="UTF-8" ?>
<!DOCTYPE configuration PUBLIC "-//mybatis.org//DTD Config 3.0//EN"
"http://mybatis.org/dtd/mybatis-3-config.dtd">
<configuration>
<settings>
<setting name="callSettersOnNulls" value="true"/>
<setting name="localCacheScope" value="STATEMENT"/>
<setting name="logPrefix" value="dao."/>
</settings>
</configuration>

7. 新建log4j.properties

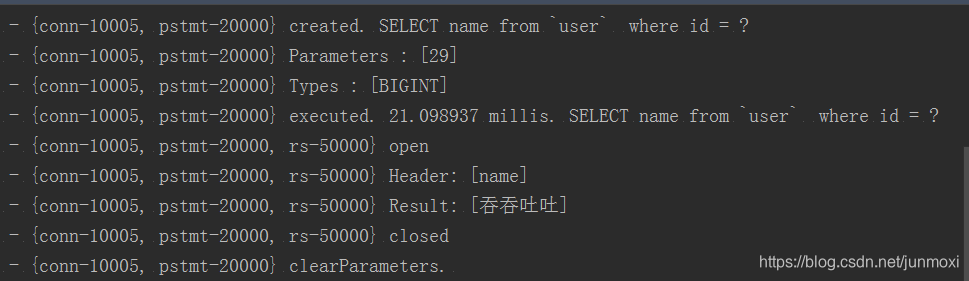
在resources下新建log4j.properties文件,如果没有此文件,控制台不会输出SQL语句

1
2
3
4
5
6
7
8
9
#1. DEBUG
#2. INFO
#3. WARN
#4. ERROR
#5. FATAL
log4j.rootLogger=DEBUG,stdout
log4j.appender.stdout=org.apache.log4j.ConsoleAppender
log4j.appender.stdout.layout=org.apache.log4j.PatternLayout
log4j.appender.stdout.layout.ConversionPattern=%d [%p] %c:%L - %m%n

8. 测试

启动项目,浏览器访问:http://localhost:8080/druid/index.html
会自动跳转到登录页面,输入你在application.yml文件中配置的loginUsername和loginPassword,可进入首页,首页如下:
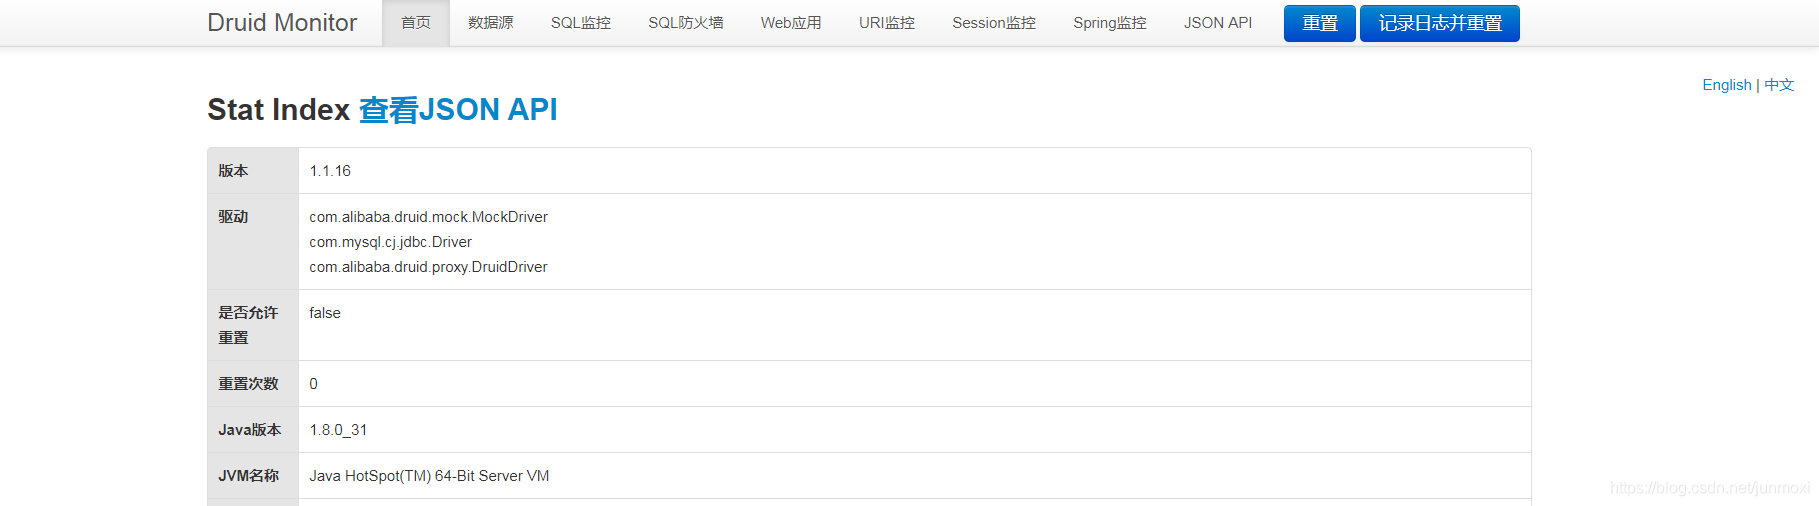
控制台打印SQL信息

Centos安装可视化桌面(noVNC)

发表于 2019-06-20 | 分类于 Linux

@[toc]

1. 关闭防火墙

1
2
3
setenforce 0
systemctl stop firewalld
systemctl disable firewalld

2. 安装tigervnc

2.1 锁定配置

1
chattr +i /etc/resolv.conf

2.2 安装tigervnc

1
yum install -y tigervnc tigervnc-server

2.3 安装桌面

查看支持的桌面

1
yum grouplist

安装桌面

1
yum groupinstall -y "GNOME Desktop"

这个过程会很慢,耐心等待

2.4 安装桌面插件

1
yum install gnome-panel

安装结束之后会报 Error:Nothing to do,不用管,没事

1
yum install nautilus

2.5 更换显示模式

默认是图形界面的模式,你可以修改为命令行模式

1
2
3
4
5
# 设置成命令模式
systemctl set-default multi-user.target

# 设置成图形模式
systemctl set-default graphical.target

3. 配置tigervnc

3.1 设置密码

1
vncpasswd

3.2 启动vnc

1
vncserver :1

: 后面是端口号,0-99 不指定默认为1,第一次会提示输入密码,前两次是可读可写的密码,输入y之后,输入只读的密码,当用只读密码进来时,只能看不能操作,以后可以使用vncpasswd命令修改密码。

4. 登录vnc

4.1 下载VNC Viewer

下载地址:https://www.realvnc.com/en/connect/download/viewer/windows/

4.2 登录

VNC Server 为 你的IP:1 这个1 是我们前面启动vncserver后面的1,如果你写的2,这里也要写2

4.3 登录效果

在这里插入图片描述

5. 安装noVnc

5.1 下载

1
2
3
4
# 下载
wget https://github.com/novnc/noVNC/archive/master.zip
# 解压
unzip master.zip

5.2 生成证书

证书要放到utils文件夹下面

1
2
3
cd noVNC-master/utils
# 生成证书
openssl req -new -x509 -days 365 -nodes -out self.pem -keyout self.pem

前面都不用写,只需要填写Common Name (e.g. server FQDN or YOUR name) []:这个字段,填写的内容是本机的hostname,可通过下面命令查看本机的hostname

1
hostname

5.3 安装noVnc

1
2
# 安装
./utils/launch.sh --vnc localhost:5901


浏览器打开:http://你的IP:6080/vnc.html 即可看到效果

输入我们前面设置的密码,即可进入桌面

Java使用itexpdf创建pdf文件并添加水印

发表于 2019-06-18 | 分类于 Java,java工具类,SpringBoot技能大全

1. 添加依赖

1
2
3
4
5
<dependency>
<groupId>com.itextpdf</groupId>
<artifactId>itextpdf</artifactId>
<version>5.5.13</version>
</dependency>

2. java代码

1
2
3
4
5
6
7
8
9
10
11
12
13
14
15
16
17
18
19
20
21
22
23
24
25
26
27
28
29
30
31
32
33
34
35
36
37
38
39
40
41
42
43
44
45
46
47
48
49
50
51
52
53
54
55
56
57
58
59
60
61
62
63
64
65
66
67
68
69
70
71
72
73
74
75
76
77
78
79
80
81
82
83
84
85
86
87
88
89
90
91
92
93
94
95
96
97
98
99
100
101
102
103
104
105
106
107
108
109
110
111
112
113
114
115
116
117
118
119
120
121
import com.itextpdf.text.Image;
import com.itextpdf.text.pdf.PdfContentByte;
import com.itextpdf.text.pdf.PdfGState;
import com.itextpdf.text.pdf.PdfReader;
import com.itextpdf.text.pdf.PdfStamper;

import java.io.FileOutputStream;
import java.util.Random;


/**
* @author pibigstar
* @create 2018-11-30 13:30
* @desc pdf工具类
**/
public class PDFUtil {
private static final float IAMGE_HEIGHT = 110f; // 水印图片的的高度
private static final float IAMGE_WIDTH = 110f; // 水印图片的的宽度

/**
* @Description: 创建pdf文件
* @param filePath: 输出文件路径
* @param contents:文件内容
*/
public static void createPdf(String filePath,String contents) {
Document document = null;
try {
document = new Document(PageSize.A4);
PdfWriter.getInstance(document,new FileOutputStream(filePath));
document.open();
//添加创建时间
document.addCreationDate();

//使用Windows系统字体(解决中文显示问题)
BaseFont baseFont = BaseFont.createFont("C:/Windows/Fonts/SIMYOU.TTF",BaseFont.IDENTITY_H,BaseFont.NOT_EMBEDDED);
Font font = new Font(baseFont);
// 设置一段内容
Paragraph paragraph = new Paragraph(contents,font);
//设置居中对齐
paragraph.setAlignment(Element.ALIGN_CENTER);

document.add(paragraph);

}catch (Exception e){
e.printStackTrace();
}finally {
if (document!=null){
document.close();
}
}
}

/**
* @Description: 添加Pdf水印
* @param pdfPath pdf地址
* @param logoPath 水印图片地址
* @param outPath 输出pdf地址
*/
public static void addPdfMark(String pdfPath,String logoPath, String outPath) throws Exception {

PdfReader reader = new PdfReader(pdfPath, "PDF".getBytes());
// 如果是web项目,直接下载应该放到response的流里面
// PdfStamper stamp = new PdfStamper(reader,response.getOutputStream());
// 添加水印之后的pdf文件
PdfStamper stamp = new PdfStamper(reader, new FileOutputStream(outPath));
int pageSize = reader.getNumberOfPages();

float pageHeight = reader.getPageSize(1).getHeight();
float pageWidth = reader.getPageSize(1).getWidth();
try {
// 每两行显示两个 左边一个,右边一个
int lineNum = (int) (pageHeight / IAMGE_HEIGHT); // 行数
int middleY = (int) pageWidth / 2;
for (int i = 1; i <= pageSize; i++) {
for (int j = 0, k = 0; j < lineNum; j = j + 4, k++) {
Random random = new Random();
// 放入水印
Image img = Image.getInstance(logoPath);
img.scaleAbsolute(IAMGE_WIDTH, IAMGE_HEIGHT * 184 / 455);
// 将水印显示到最底层
img.setAlignment(Image.UNDERLYING);
int trueY;
while (true) {
trueY = random.nextInt(middleY);
if (trueY > IAMGE_WIDTH / 2 && trueY < (middleY - IAMGE_WIDTH)) {
break;
}
}
// 水印的位置
img.setAbsolutePosition(trueY, j * IAMGE_HEIGHT + (float) random.nextInt((int) IAMGE_HEIGHT) - (k % 2) * 10);
// 旋转 角度
img.setRotationDegrees(random.nextInt(360));
PdfContentByte under = stamp.getUnderContent(i);

PdfGState gs = new PdfGState();
// 设置透明度为0.5
gs.setFillOpacity(0.5f);
under.setGState(gs);
under.addImage(img);
while (true) {
trueY = random.nextInt(middleY) + middleY;
if (trueY > middleY + IAMGE_WIDTH / 2 && trueY < (2 * middleY - IAMGE_WIDTH)) {
break;
}
}
// 水印的位置
img.setAbsolutePosition(trueY, j * IAMGE_HEIGHT + (float) random.nextInt((int) IAMGE_HEIGHT) - (k % 2) * 10);
// 旋转角度
img.setRotationDegrees(random.nextInt(360));
under.addImage(img);
}
}
} catch (Exception e) {
throw e;
} finally {
stamp.close();
reader.close();
}

}
}

3. 测试

1
2
3
4
5
6
7
public class TestPDFUtil {
public static void main(String[] args) throws Exception {
PDFUtil.createPdf("D:\\1.pdf","我是派大星");
PDFUtil.addPdfMark("D:\\1.pdf","D:\\go_logo.png","D:\\test.pdf");
System.out.println("done");
}
}

java使用zxing制作二维码

发表于 2019-06-16 | 分类于 Java,java工具类,SpringBoot技能大全

因为项目需要,我封装了三个不同的二维码构建,一个是制作普通的二维码,一个是带logo的,还有一个是带logo和文字的,不废话,直接上代码。

添加依赖

1
2
3
4
5
<dependency>
<groupId>com.google.zxing</groupId>
<artifactId>core</artifactId>
<version>3.3.3</version>
</dependency>

代码

1
2
3
4
5
6
7
8
9
10
11
12
13
14
15
16
17
18
19
20
21
22
23
24
25
26
27
28
29
30
31
32
33
34
35
36
37
38
39
40
41
42
43
44
45
46
47
48
49
50
51
52
53
54
55
56
57
58
59
60
61
62
63
64
65
66
67
68
69
70
71
72
73
74
75
76
77
78
79
80
81
82
83
84
85
86
87
88
89
90
91
92
93
94
95
96
97
98
99
100
101
102
103
104
105
106
107
108
109
110
111
112
113
114
115
116
117
118
119
120
121
122
123
124
125
126
127
128
129
130
131
132
133
134
135
136
137
138
139
140
141
142
143
144
145
146
147
148
149
150
151
152
153
154
155
156
157
158
159
160
161
162
163
164
165
166
167
168
169
170
171
172
173
174
175
176
177
178
179
180
181
182
183
184
185
186
187
188
189
190
191
192
193
194
195
196
package com.pibgstar.demo.utils;

import com.google.zxing.BarcodeFormat;
import com.google.zxing.EncodeHintType;
import com.google.zxing.MultiFormatWriter;
import com.google.zxing.WriterException;
import com.google.zxing.common.BitMatrix;
import com.google.zxing.qrcode.decoder.ErrorCorrectionLevel;

import javax.imageio.ImageIO;
import java.awt.*;
import java.awt.image.BufferedImage;
import java.io.File;
import java.util.HashMap;
import java.util.Map;

/**
* @author pibigstar
* @create 2018-11-29 10:17
* @desc 二维码生成工具类
**/
public class ZXingCodeUtil {
// 二维码颜色
private static final int QRCOLOR = 0xFF000000;
// 背景色
private static final int BGCOLOR = 0xFFFFFFFF;
// 二维码宽度
private static final int width = 400;
// 二维码高度
private static final int height = 400;

/**
* @Author:pibigstar
* @Description: 生成普通的二维码
* @Date:
*/
public static BufferedImage createCode(String qrUrl) {
MultiFormatWriter multiFormatWriter = null;
BitMatrix bm = null;
BufferedImage image = null;
Map<EncodeHintType, Object> hints = getDecodeHintType();
try {
multiFormatWriter = new MultiFormatWriter();
// 参数顺序分别为:编码内容,编码类型,生成图片宽度,生成图片高度,设置参数
bm = multiFormatWriter.encode(qrUrl, BarcodeFormat.QR_CODE, width, height, hints);
int w = bm.getWidth();
int h = bm.getHeight();
image = new BufferedImage(w, h, BufferedImage.TYPE_INT_RGB);

// 开始利用二维码数据创建Bitmap图片,分别设为黑(0xFFFFFFFF)白(0xFF000000)两色
for (int x = 0; x < w; x++) {
for (int y = 0; y < h; y++) {
image.setRGB(x, y, bm.get(x, y) ? QRCOLOR : BGCOLOR);
}
}
} catch (WriterException e) {
e.printStackTrace();
}
return image;
}

/**
* @Author:pibigstar
* @Description: 生成带logo的二维码
* @Date:
*/
public static BufferedImage createCodeWithLogo(String qrUrl, String logoPath) {
BufferedImage bim = createCode(qrUrl);
try {
// 读取二维码图片,并构建绘图对象
BufferedImage image = bim;
Graphics2D g = image.createGraphics();

// 读取Logo图片
BufferedImage logo = ImageIO.read(new File(logoPath));
//设置logo的大小,这里设置为二维码图片的20%,过大会盖掉二维码
int widthLogo = logo.getWidth(null) > image.getWidth() * 3 / 10 ? (image.getWidth() * 3 / 10) : logo.getWidth(null),
heightLogo = logo.getHeight(null) > image.getHeight() * 3 / 10 ? (image.getHeight() * 3 / 10) : logo.getWidth(null);

// logo放在中心
int x = (image.getWidth() - widthLogo) / 2;
int y = (image.getHeight() - heightLogo) / 2;
// logo放在右下角
// int x = (image.getWidth() - widthLogo);
// int y = (image.getHeight() - heightLogo);

//开始绘制图片
g.drawImage(logo, x, y, widthLogo, heightLogo, null);
g.dispose();
logo.flush();
image.flush();
return image;
} catch (Exception e) {
e.printStackTrace();
}
return null;
}

/**
* @Author:pibigstar
* @Description: 生成带logo和文字的二维码
* @Date:
*/
public static BufferedImage createCodeWithLogoAndText(String qrUrl, String logoPath, String text) {
BufferedImage image = createCodeWithLogo(qrUrl, logoPath);
//把文字添加上去,文字不要太长,这里最多支持两行。太长就会自动截取啦
try {
if (text != null && !text.equals("")) {
//新的图片,把带logo的二维码下面加上文字
BufferedImage outImage = new BufferedImage(400, 445, BufferedImage.TYPE_4BYTE_ABGR);
Graphics2D outg = outImage.createGraphics();
//画二维码到新的面板
outg.drawImage(image, 0, 0, image.getWidth(), image.getHeight(), null);
//画文字到新的面板
outg.setColor(Color.BLACK);
outg.setFont(new Font("宋体", Font.BOLD, 30)); //字体、字型、字号
int strWidth = outg.getFontMetrics().stringWidth(text);
if (strWidth > 399) {
// //长度过长就截取前面部分
// outg.drawString(productName, 0, image.getHeight() + (outImage.getHeight() - image.getHeight())/2 + 5 ); //画文字
//长度过长就换行
String productName1 = text.substring(0, text.length() / 2);
String productName2 = text.substring(text.length() / 2, text.length());
int strWidth1 = outg.getFontMetrics().stringWidth(productName1);
int strWidth2 = outg.getFontMetrics().stringWidth(productName2);
outg.drawString(productName1, 200 - strWidth1 / 2, image.getHeight() + (outImage.getHeight() - image.getHeight()) / 2 + 12);
BufferedImage outImage2 = new BufferedImage(400, 485, BufferedImage.TYPE_4BYTE_ABGR);
Graphics2D outg2 = outImage2.createGraphics();
outg2.drawImage(outImage, 0, 0, outImage.getWidth(), outImage.getHeight(), null);
outg2.setColor(Color.BLACK);
outg2.setFont(new Font("宋体", Font.BOLD, 30)); //字体、字型、字号
outg2.drawString(productName2, 200 - strWidth2 / 2, outImage.getHeight() + (outImage2.getHeight() - outImage.getHeight()) / 2 + 5);
outg2.dispose();
outImage2.flush();
outImage = outImage2;
} else {
outg.drawString(text, 200 - strWidth / 2, image.getHeight() + (outImage.getHeight() - image.getHeight()) / 2 + 12); //画文字
}
outg.dispose();
outImage.flush();
image = outImage;
image.flush();
}
} catch (Exception e) {
e.printStackTrace();
}
return image;
}

/**
* @Author:pibigstar
* @Description: 构建二维码
* @Date:
*/
private static BufferedImage create(String qrUrl, String logoPath, String text) {
MultiFormatWriter multiFormatWriter = null;
BitMatrix bm = null;
BufferedImage image = null;
Map<EncodeHintType, Object> hints = getDecodeHintType();
try {
multiFormatWriter = new MultiFormatWriter();
// 参数顺序分别为:编码内容,编码类型,生成图片宽度,生成图片高度,设置参数
bm = multiFormatWriter.encode(qrUrl, BarcodeFormat.QR_CODE, width, height, hints);
int w = bm.getWidth();
int h = bm.getHeight();
image = new BufferedImage(w, h, BufferedImage.TYPE_INT_RGB);

// 开始利用二维码数据创建Bitmap图片,分别设为黑(0xFFFFFFFF)白(0xFF000000)两色
for (int x = 0; x < w; x++) {
for (int y = 0; y < h; y++) {
image.setRGB(x, y, bm.get(x, y) ? QRCOLOR : BGCOLOR);
}
}
} catch (WriterException e) {
e.printStackTrace();
}
return image;
}

/**
* 设置二维码的格式参数
* @return
*/
private static Map<EncodeHintType, Object> getDecodeHintType() {
// 用于设置QR二维码参数
Map<EncodeHintType, Object> hints = new HashMap<EncodeHintType, Object>();
// 设置QR二维码的纠错级别(H为最高级别)具体级别信息
hints.put(EncodeHintType.ERROR_CORRECTION, ErrorCorrectionLevel.H);
// 设置编码方式
hints.put(EncodeHintType.CHARACTER_SET, "utf-8");
hints.put(EncodeHintType.MARGIN, 0);
hints.put(EncodeHintType.MAX_SIZE, 350);
hints.put(EncodeHintType.MIN_SIZE, 100);
return hints;
}
}

测试

1
2
3
4
5
6
7
8
9
10
11
12
13
14
15
public class TestZxingCodeUtil {

public static void main(String[] args) throws IOException {
BufferedImage bim = ZXingCodeUtil.createCode("http://www.pibigstar.com");
ImageIO.write(bim, "png", new File("D:\\Document And Settings3\\Admin\\Desktop\\" + new Date().getTime() + ".png"));

bim = ZXingCodeUtil.createCodeWithLogo("http://www.pibigstar.com","D:\\Document And Settings3\\Admin\\Desktop\\文本资料\\网站\\qq.png");
ImageIO.write(bim, "png", new File("D:\\Document And Settings3\\Admin\\Desktop\\" + new Date().getTime() + ".png"));

bim = ZXingCodeUtil.createCodeWithLogoAndText("http://www.pibigstar.com","D:\\Document And Settings3\\Admin\\Desktop\\文本资料\\网站\\qq.png","派大星博客");
ImageIO.write(bim, "png", new File("D:\\Document And Settings3\\Admin\\Desktop\\" + new Date().getTime() + ".png"));

System.out.println("done");
}
}

生成效果

1. 普通二维码

2. 带logo的二维码

3. 带logo和文字的二维码

SpringBoot访问外部文件及默认路由

发表于 2019-06-15 | 分类于 springboot,SpringBoot技能大全

1 新增配置类

1
2
3
4
5
6
7
8
9
10
11
12
13
14
15
16
17
18
19
20
21
22
23
24
25
26
27
28
29
30
31
32

package com.pibigstar.common.config;

import org.springframework.context.annotation.Configuration;
import org.springframework.web.servlet.config.annotation.InterceptorRegistry;
import org.springframework.web.servlet.config.annotation.ResourceHandlerRegistry;
import org.springframework.web.servlet.config.annotation.WebMvcConfigurer;

import com.pibigstar.common.Constant;

@Configuration
public class WebConfig implements WebMvcConfigurer{

/**
* 访问外部文件配置,访问D盘下文件
*/
@Override
public void addResourceHandlers(ResourceHandlerRegistry registry) {
//配置server虚拟路径,handler为jsp中访问的目录,locations为files相对应的本地路径
registry.addResourceHandler("/files/**").addResourceLocations("file:///D:upload/");
}
/**
* 配置默认路由
*/
@Override
public void addViewControllers(ViewControllerRegistry registry) {
//将浏览器的默认行为重定向到主页
registry.addViewController("/").setViewName("redirect:/index.htm");
//测试页面
registry.addViewController("/test.htm").setViewName("/test.jsp");
}
}

2 访问

我们将test.jpg文件上传到D盘的upload文件夹后,那么在页面端访问则通过:localhost:8080/files/test.jpg

油猴插件编写学习

发表于 2019-06-12 | 分类于 js

油猴可以帮助我们在任意网页中镶嵌脚本来达到一些辅助我们的目的。

油猴官网:https://tampermonkey.net/

1. 基本编写

1
2
3
4
5
6
7
8
9
10
11
12
13
14
15
16
17
// ==UserScript==
// @name 脚本的名称
// @namespace 可以写个人的网站什么的
// @version 版本号
// @description 脚本的描述
// @author 作者
// @match 匹配站点,在那个网页中启用该脚本,可使用正则进行匹配
// @match http://119.36.55.224:6850/zentao/my/
// @match http://www.iqiyi.com/v_*
// @grant 需要什么权限(GM_addStyle添加css样式权限)
// @grant GM_addStyle
// @require 引用外部js
// @require http://apps.bdimg.com/libs/jquery/2.1.4/jquery.min.js
// ==/UserScript==
$(function() {
//在这里编写我们的脚本
})();

2. 写一个百度自动搜索小脚本

1
2
3
4
5
6
7
8
9
10
11
12
13
14
// ==UserScript==
// @name 自动输入
// @namespace http://pibigstar.com/
// @version 0.1
// @description 百度框自动输入
// @author 派大星
// @match https://www.baidu.com
// @require https://cdn.bootcss.com/jquery/2.2.1/jquery.js
// @grant none
// ==/UserScript==
(function() {
$("#kw").val("java派大星");
$("#su").click();
})();

3. 为百度新添加一个按钮

1
2
3
4
5
6
7
8
9
10
11
12
13
14
15
16
17
18
19
20
21
// ==UserScript==
// @name 自动输入
// @namespace http://pibigstar.com/
// @version 0.1
// @description 百度框自动输入
// @author 派大星
// @match https://www.baidu.com
// @match http://www.cnblogs.com/*
// @require https://cdn.bootcss.com/jquery/2.2.1/jquery.js
// @grant GM_addStyle
// ==/UserScript==
(function() {
//与元数据块中的@grant值相对应,功能是生成一个style样式
GM_addStyle('#myBtn{color: white;position: absolute;left: 1100px;top: 243px;width: 100px;height: 36px;background: #3385ff;border-bottom: 1px solid #2d7');
var html = "<input type='button' id='myBtn' value='新增按钮' />";
$("body").append(html);
// 定义按钮事件
$("#myBtn").click(function(){
alert("点击了新增按钮");
});
})();

4. 综合,写一个VIP视频解析脚本

1
2
3
4
5
6
7
8
9
10
11
12
13
14
15
16
17
18
19
20
21
22
23
24
25
26
27
28
29
30
31
32
33
34
35
36
37
38
39
40
41
42
43
44
45
46
47
48
49
50
51
52
53
54
55
56
57
58
59
60
61
62
63
64
65
66
67
68
69
70
71
72
73
74
75
76
77

// ==UserScript==
// @name 视频vip解析
// @namespace http://mxspvip.cn
// @version 1.2
// @description 支持,优酷、爱奇艺、腾讯、乐视等vip视频播放
// @author pibigstar
// @match http://www.iqiyi.com/v_*
// @match http://www.mgtv.com/v/*
// @match http://www.le.com/ptv/*
// @match http://v.youku.com/v_show/*
// @match http://film.sohu.com/album/*
// @match http://tv.sohu.com/*
// @match https://v.qq.com/x/cover/*
// @grant GM_addStyle
// @require https://cdn.bootcss.com/jquery/2.2.1/jquery.js
// ==/UserScript==

(function (){
GM_addStyle('#floatDivBoxs{width:170px;background:#fff;position:fixed;top:180px;right:0;z-index:999;}')
GM_addStyle('#floatDivBoxs a{color:#666;text-decoration:none;outline:none;}')
GM_addStyle('#floatDivBoxs a:hover{color:#e8431f;}')
GM_addStyle('#floatDivBoxs .floatDtt{width:100%;height:50px;line-height:50px; background:#f08326;color:#fff;font-size:20px;text-indent:22px;position:relative;}')
GM_addStyle('#floatDivBoxs .floatDqq{padding:0 14px;}')
GM_addStyle('#floatDivBoxs .floatDqq li{height:45px;line-height:45px;font-size:15px;border-bottom:1px solid #e3e3e3;}')
GM_addStyle('#floatDivBoxs .floatDbg{width:100%;height:20px;box-shadow:-2px 0 3px rgba(0,0,0,0.25);}')
GM_addStyle('.floatShadow{box-shadow:-2px 0 3px rgba(0,0,0,0.25);}')
GM_addStyle('#rightArrow{width:50px;height:45px;position:fixed;top:180px;right:170px;z-index:999;}')
GM_addStyle('#rightArrow a{background:#F08326;display:block;height:50px;}')
GM_addStyle('#rightArrow a img{background:#F08326;display:block;height:50px;width:45px;}')

var html = '<div id="rightArrow"><a href="javascript:;" title=""><img id="rightImg" src="http://pmyln8jkg.bkt.clouddn.com/youhou/right.png" /></a></div>'
html += '<div id="floatDivBoxs">'
html += '<div class="floatDtt">vip通道</div>'
html += '<div class="floatShadow">'
html += '<ul class="floatDqq">'
html += '<li><a href="#" name="vip" url="http://www.wmxz.wang/video.php?url="> 无名小站</a></li>'
html += '<li><a href="#" name="vip" url="https://cn.bjbanshan.cn/jiexi.php?url=">1号接口</a></li>'
html += '<li><a href="#" name="vip" url="https://aikan-tv.com/tong.php?url=">2号接口</a></li>'
html += '<li><a href="#" name="vip" url="http://api.51ckm.com/jx.php?url=">3号接口</a></li>'
html += '<li><a href="#" name="vip" url="http://api.nepian.com/ckparse/?url=">4号接口</a></li>'
html += '<li><a href="#" name="vip" url="http://jqaaa.com/jq3/?url=">5号接口</a></li>'
html += '<li><a href="#" name="vip" url="http://2gty.com/apiurl/yun.php?url=">6号接口</a></li>'
html += '<li><a href="#" name="vip" url="http://http://aikan-tv.com/?url=">7号接口</a></li>'
html += '<li><a href="#" name="vip" url="http://y.mt2t.com/lines?url=">8号接口</a></li>'
html += ' </ul>'
html += '</div>'
html += '</div>'
// 添加到页面上
$("body").append(html);
//浮动代码
var flag=1;
$('#rightArrow').click(function(){
if(flag==1){
$("#floatDivBoxs").animate({right: '-175px'},300);
$(this).animate({right: '-5px'},300);
$(this).css('background-position','-50px 0');
$("#rightImg").attr("src","http://pmyln8jkg.bkt.clouddn.com/youhou/left.png");
flag=0;
}else{
$("#floatDivBoxs").animate({right: '0'},300);
$(this).animate({right: '170px'},300);
$(this).css('background-position','0px 0');
$("#rightImg").attr("src","http://pmyln8jkg.bkt.clouddn.com/youhou/right.png");
flag=1;
}
});

})();
// 监听每一个接口点击事件
$("a[name='vip']").on("click",function(){
//获取当前网址
var url = window.location;
var api = $(this).attr("url");
window.open(api+url,'','width=632,height=388,toolbar=no,location=no,status=no, menubar=no, resizable=yes, scrollbars=yes');
return false;
})

注解防止表单重复提交

发表于 2019-06-10 | 分类于 Java,SpringBoot技能大全

1. 注解

1
2
3
4
@Target(ElementType.METHOD)
@Retention(RetentionPolicy.RUNTIME)
public @interface StopRepeatSubmit {
}

2. 拦截处理器

1
2
3
4
5
6
7
8
9
10
11
12
13
14
15
16
17
18
19
20
21
22
23
24
25
26
27
28
29
30
31
32
33
34
35
36
37
38
39
40
/**
* @author pibigstar
* @desc 防止表单重复提交拦截处理器
**/

public class StopRepeatSubmitHandlerInterceptor extends HandlerInterceptorAdapter {

@Override
public boolean preHandle(HttpServletRequest request, HttpServletResponse response, Object handler) throws Exception {

if (handler instanceof HandlerMethod) {
HandlerMethod handlerMethod = (HandlerMethod) handler;
Method method = handlerMethod.getMethod();
StopRepeatSubmit annotation = method.getAnnotation(StopRepeatSubmit.class);
if (annotation!=null) {
// 判断是否已经提交过了
String paramter = request.getParameterMap().toString();
String url = request.getRequestURL().toString();
String token = url+paramter;
Object attrToken = request.getSession().getAttribute("token");
if (attrToken == null) {
// 第一次请求
request.getSession().setAttribute("token",token);
return true;
}
if (attrToken.toString().equals(token)){
// 重复提交了
return false;
} else {
// 第一次提交
request.getSession().setAttribute("token",token);
return true;
}
}
return true;
} else {
return super.preHandle(request, response, handler);
}
}
}

3. 使用

1
2
3
4
@PostMapping("/submit")
@StopRepeatSubmit
public void submit(){
}

git常用操作详细说明

发表于 2019-06-10 | 分类于 工具使用,git

初级的就不说了,下面记录一些常用且稍微高级点的操作
@[TOC]

git的管理流程

工作区 ——> git add ——> Index[索引][暂存区] ——> git commit ——> HEAD[快照]

当执行git add 后其实就是将更改的文件放入到暂存区中,当执行git commit时就是将暂存区的内容提交到当前分支

  • HEAD快照是保存你最后一次commit的内容
  • git push 是将快照区的内容push 上去

git常用操作

1
2
3
4
5
6
7
8
9
10
11
12
13
14
15
16
17
18
19
# 图形化显示log日志
gitk --all
# 简洁的log 日志
git log --oneline
# 查看所有分支
git log --all
# 显示最近4个提交
git log -n4
# 显示变更信息
git log --graph
# 查看暂存区与HEAD中的差别
git diff --cached
# 配置git log
git config --global alias.lg "log --graph --pretty=format:'%Cred%h%Creset - %C(yellow)%d%Creset %s %Cgreen(%cr) %C(bold blue)<%an>%Creset' --abbrev-commit --date=relative"
# 使用
git lg

# 查看提交了多少行代码
git log --author="$(git config --get user.name)" --pretty=tformat: --numstat | gawk '{ add += $1 ; subs += $2 ; loc += $1 - $2 } END { printf "added lines: %s removed lines : %s total lines: %s\n",add,subs,loc }' -

1. 关联

  • 1.1 关联仓库

    1
    git remote add origin 仓库地址

你可以同时关联其他的仓库(也包括gitee和gitlab)

1
git remote add origin-2 仓库地址

这样你push的时候

1
git push origin-2 master

2. 分支

2.1 只创建一个分支

1
git branch fix-1

2.2 创建分支并切换此分支

1
git checkout -b feat-1

2.3 切换分支

1
git checkout master

2.4 查看所有分支

1
git branch -v

2.5 删除分支

1
git branch -d feat-1

2.6 删除除master以外的所有分支

1
git branch | grep -v "master" | xargs git branch -D

3. 临时暂存区

3.1 将更改放到临时暂存区

1
git stash

3.2 将更改从临时暂存区取出

1
git stash pop

3.3 查看临时暂存区内容

1
git stash list

3.4 恢复指定临时暂存区

1
git stash apply stash@{id}

4. 合并冲突

1.更新代码 git fetch
2.合并分支 git rebase origin/develop //将develop分支与此分支合并
3.会进入合并分支,当有CONFLICT:Merge file.txt, 手动去修改此文件
4.修改之后添加冲突文件 git add file.txt
5.继续合并 git rebase --continue, 如果有错误继续 执行 3 4 步骤
6.当分支名变成你的分支名则表示合并完成
7.查看当前状态 git status
8.如果状态都为已暂存,则可以执行 git push origin 分支名 进行提交

push之前忘记git pull

出现

1
! [rejected]  master -> master (fetch first)

可以使用下面这个命令

1
git pull --rebase origin master

这个命令是先取消commit记录,并且把它们临时 保存为补丁(patch)(这些补丁放到”.git/rebase”目录中),之后同步远程库到本地,最后合并补丁到本地库之中。

然后再直接进行push就可以了

5. 回滚

5.1 撤销掉本地修改(还没被git add)

1
2
3
4
# 撤销某具体文件
git checkout fileName
# 撤销所有
git checkout .

5.2 撤销上一次git add的内容

1
2
3
4
# 撤销某个文件
git reset HEAD fileName
# 撤销所有
git reset HEAD .

只撤销某个文件

1
git reset HEAD 文件路径/文件名

5.3 撤销上一次git commit

  1. 先查看日志,记录commit id

    1
    git log
  2. 恢复到指定commit

    1
    2
    3
    git reset commit_id
    # 备用
    git reset --hard commit_id

5.4 修改上一次commit

1
git commit --amend

5.5 撤销git commit 和 git add 以及 工作区更新的内容

1
git reset --hard HEAD~

5.5 删除远程分支中某个文件

这个只是让此文件不受版本控制了,而本地是不会删除它的

1
2
3
4
5
git rm -r –-cached 文件路径/文件名

git add .
git commit -m "delete the file"
git push origin master

5.6 回滚到指定版本

  1. 查看日志拿到commitid

    1
    git log
  2. 恢复到指定版本

    1
    git reset --hard commit_id

6.开源协作

6.1 fork别人代码

此时你的仓库就会有一个此项目的副本

6.2 克隆代码

1
git clone *****.git

6.3 添加别人远程仓库地址

为了可以随时更新代码,这里最好将别人仓库的地址也新增一下

1
git remote add origin2 *****.git

拉取别人最新代码

1
git pull origin2 master

6.4 提交

添加新的功能之后开始提交代码,代码是提交到你的仓库中

1
git push origin master

6.5 提交PR

去你GitHub中此项目然后会有一个New pull Request


点击它,然后向别人的项目提交PR

SpringBoot操作elasticsearch

发表于 2019-06-08 | 分类于 springboot,SpringBoot技能大全

注意: elasticsearch版本一定要和SpringBoot版本相对应。

这里使用的是:elasticsearch : 6.5.3, Springboot: 2.1.0

下载Elasticsearch:https://artifacts.elastic.co/downloads/elasticsearch/elasticsearch-6.5.3.zip

监控Elasticsearch中的值:https://artifacts.elastic.co/downloads/kibana/kibana-6.5.3-windows-x86_64.zip

  1. 启动elasticsearch

    1
    elasticsearch-6.5.3/bin/ealsticsearch.batelasticsearch-6.5.3/bin/ealsticsearch.bat
  2. 启动监控

    1
    kibana-6.5.3-windows-x86_64/bin/kibana.bat

启动成功后访问:127.0.0.1:5601

1. 添加依赖

1
2
3
4
<dependency>
<groupId>org.springframework.data</groupId>
<artifactId>spring-data-elasticsearch</artifactId>
</dependency>

2. 添加配置信息

1
2
3
4
5
6
7
server:
port: 8080
spring:
data:
elasticsearch:
cluster-nodes: 127.0.0.1:9300
cluster-name: elasticsearch

3. 标记bean

1
2
3
4
5
6
7
8
// index索引就相当于数据库,type就相当于表
@Document(indexName = "pibigstar",type = "user")
public class ElasticUser {
private Long id;
private String username;
private String password;
//setter,getter方法
}

4. dao层

1
2
3
4
5
import com.pibgstar.demo.elastic.bean.ElasticUser;
import org.springframework.data.elasticsearch.repository.ElasticsearchRepository;

public interface ElasticUserDao extends ElasticsearchRepository<ElasticUser,Long> {
}

5. Controller层

1
2
3
4
5
6
7
8
9
10
11
12
13
14
15
16
17
18
19
20
21
22
23
24
25
26
27
28
29
30
31
32
33
34
35
36
37
38
39
40
41
42
43
44
45
46
47
48
49
50
51
52
53
54
55
56
57
58
59
60
61
62
63
64
65
66
67
68
69
70
71
72
73
74
75
76
@RestController
@RequestMapping("/user")
public class ElasticUserController {
private long sum = 1;

@Autowired
private ElasticUserDao userDao;
// 获取全部
@GetMapping("/list")
public List<ElasticUser> list(){
Iterable<ElasticUser> all = userDao.findAll();
Iterator<ElasticUser> iterator = all.iterator();
List<ElasticUser> list=new ArrayList<>();
while (iterator.hasNext()) {
list.add(iterator.next());
}
return list;
}
// 添加
@RequestMapping("/add")
public ElasticUser add(ElasticUser user) {
user.setId(sum++);
ElasticUser save = userDao.save(user);
return save;
}
// 根据id获取
@GetMapping("/get")
public ElasticUser get(Long id){
Optional<ElasticUser> byId = userDao.findById(id);
return byId.get();
}
// 删除
@RequestMapping("/delete")
public void delete(ElasticUser user){
userDao.delete(user);
}
// 更新
@RequestMapping("/update")
public ElasticUser update(ElasticUser user) {
ElasticUser save = userDao.save(user);
return save;
}
// 搜索
@GetMapping("/query")
public List<ElasticUser> query(@RequestParam(name = "value") String value){
// 当id、username、password字段的值等于value时可查出数据(里面的值要有value,不然会报错)
// QueryStringQueryBuilder builder = new QueryStringQueryBuilder(value);

// 搜索 id、username字段的值等于value
// QueryBuilder builder = QueryBuilders.multiMatchQuery(value,"id","username");

// 模糊查询,username字段中的值含有value
QueryBuilder builder1 = QueryBuilders.wildcardQuery("username","*"+value+"*");
// password字段等于1
QueryBuilder builder2 = QueryBuilders.wildcardQuery("password","*456*");

// 复合查询
BoolQueryBuilder boolQueryBuilder = QueryBuilders.boolQuery();
// and 结果中 username含有value 并且 password = 456
// boolQueryBuilder.must(builder1);
// boolQueryBuilder.must(builder2);

// or 结果中 username含有value 或 password = 456
boolQueryBuilder.should(builder1);
boolQueryBuilder.should(builder2);

System.out.println("查询的语句:"+boolQueryBuilder);
Iterable<ElasticUser> searchResult = userDao.search(boolQueryBuilder);
Iterator<ElasticUser> iterator = searchResult.iterator();
List<ElasticUser> list=new ArrayList<>();
while (iterator.hasNext()) {
list.add(iterator.next());
}
return list;
}
}

Go语言入门(1)Go语言的安装与配置

发表于 2019-06-07 | 分类于 go

1. 下载Go语言

GO安装包下载地址: https://studygolang.com/dl

2. Windows下安装GO

下载好之后,直接安装,下一步。。。。finsh

测试是否安装成功:

1
go version

3. 配置GOPATH

新建环境变量 GOPATH = D:/goWork

GOPATH是你的工作目录,它包括三个目录:bin(存放编译好的可运行文件)、pkg(存放二进制文件)、src(存放源码文件)

当通过 go get github.com/astaxie/beego 下载的库都会放到这个GOPATH里面

4. 下载开发工具

这里使用的开发工具为 goland

下载地址:https://www.jetbrains.com/go/

5. 配置goland

主要配置 GOROOT 和 GOPATH

1…567…14
派大星

派大星

137 日志
64 分类
230 标签
GitHub CSDN
© 2019 派大星